DIY Organic Henna: How to Create Your Own Chemical-Free Designs at Home


Discover the Art of DIY Organic Henna
Henna has been used for centuries as a natural dye for skin, hair, and fabrics. Today, it's celebrated not only for its beauty but also for its cultural significance. By creating your own organic henna at home, you can ensure that your designs are chemical-free and safe for your skin. Let's delve into the process of making your own henna paste and explore the artistry of henna designs.
Understanding Henna and Its Benefits
Henna is derived from the leaves of the Lawsonia inermis plant, which naturally contains a reddish-brown dye. This dye bonds with the keratin in your skin, creating long-lasting designs. One of the greatest benefits of using organic henna is that it is free from harmful chemicals often found in commercial henna products. This makes it a safer choice for those with sensitive skin or allergies.
Gathering Your Ingredients
To create your own organic henna paste, you will need a few simple ingredients:
- 100 grams of organic henna powder
- Freshly squeezed lemon juice
- Sugar
- A few drops of essential oil (such as lavender or eucalyptus)
These ingredients are not only easy to find but also ensure that your paste is both effective and fragrant.
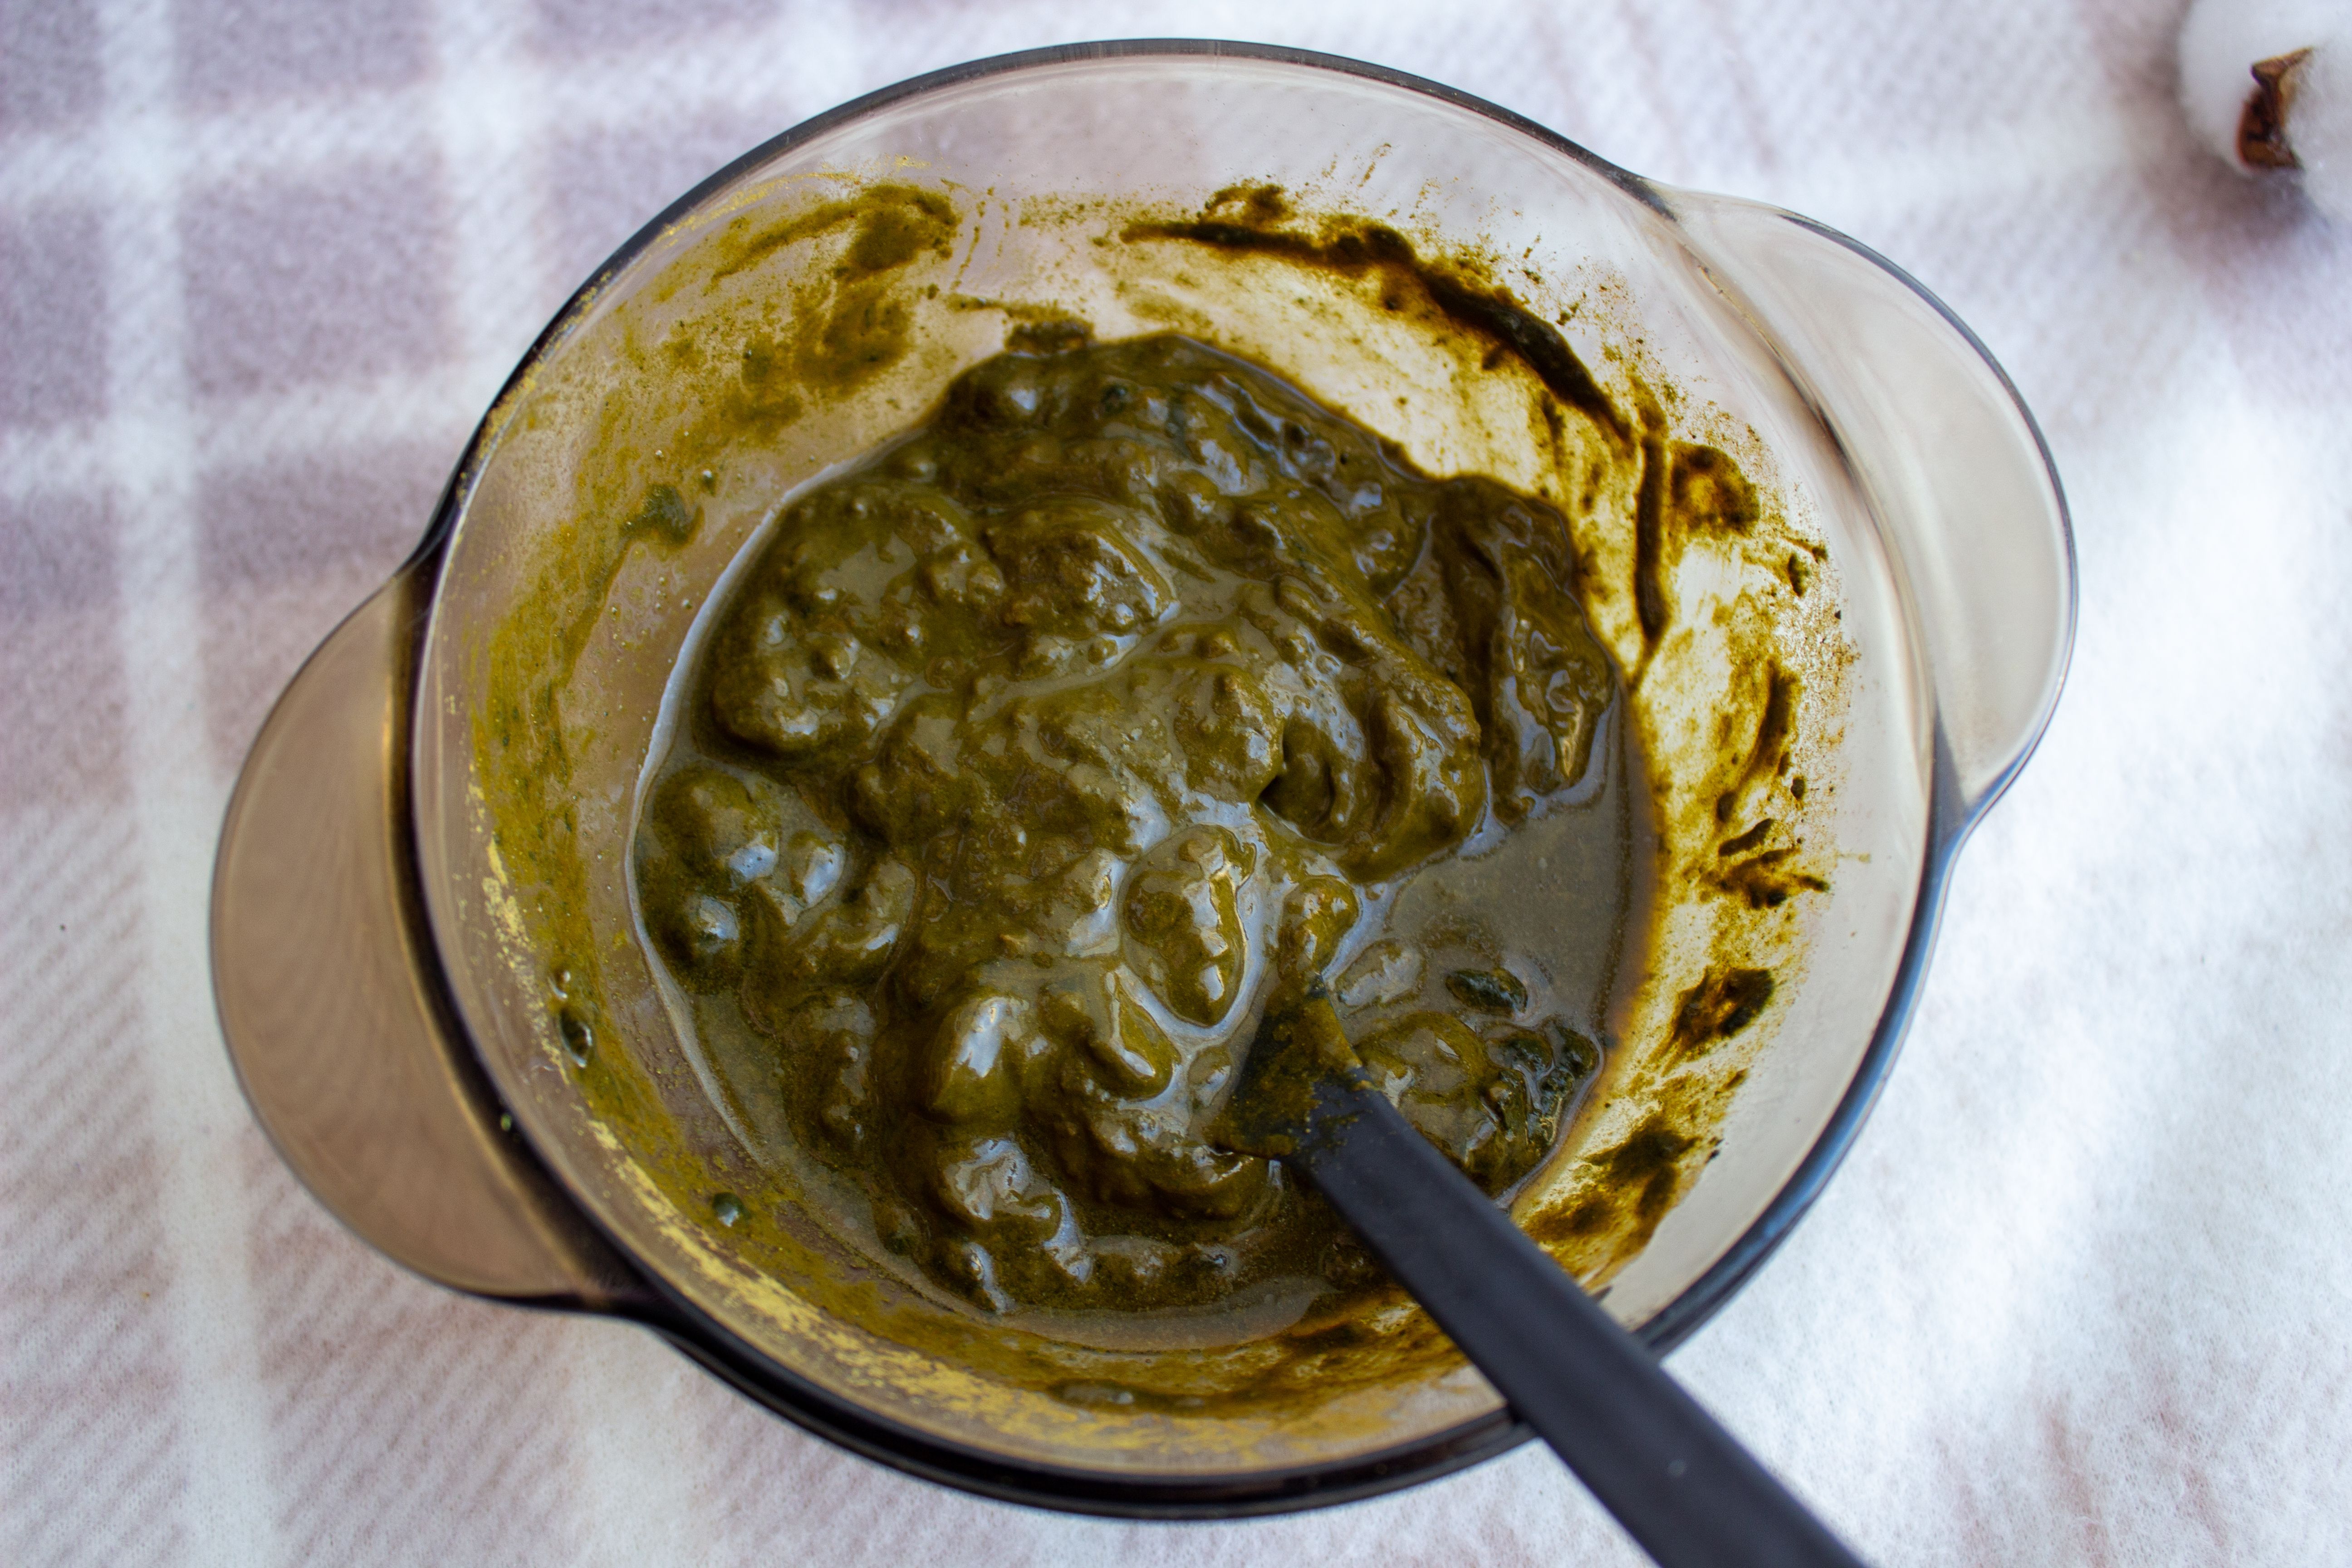
The Henna-Mixing Process
Step 1: Begin by sifting the henna powder to remove any lumps. This will create a smoother paste. Place the sifted powder in a bowl.
Step 2: Gradually add lemon juice to the powder, stirring continuously until the mixture reaches a thick, yogurt-like consistency. Cover the bowl with plastic wrap and let it sit for about 12 to 24 hours, allowing the dye to release.
Perfecting Your Henna Paste
Step 3: After the resting period, add sugar to the paste. This will help the paste adhere better to the skin. Mix well until fully incorporated.
Step 4: Finally, add a few drops of your chosen essential oil. These oils not only improve the scent of the paste but also enhance its dyeing properties.

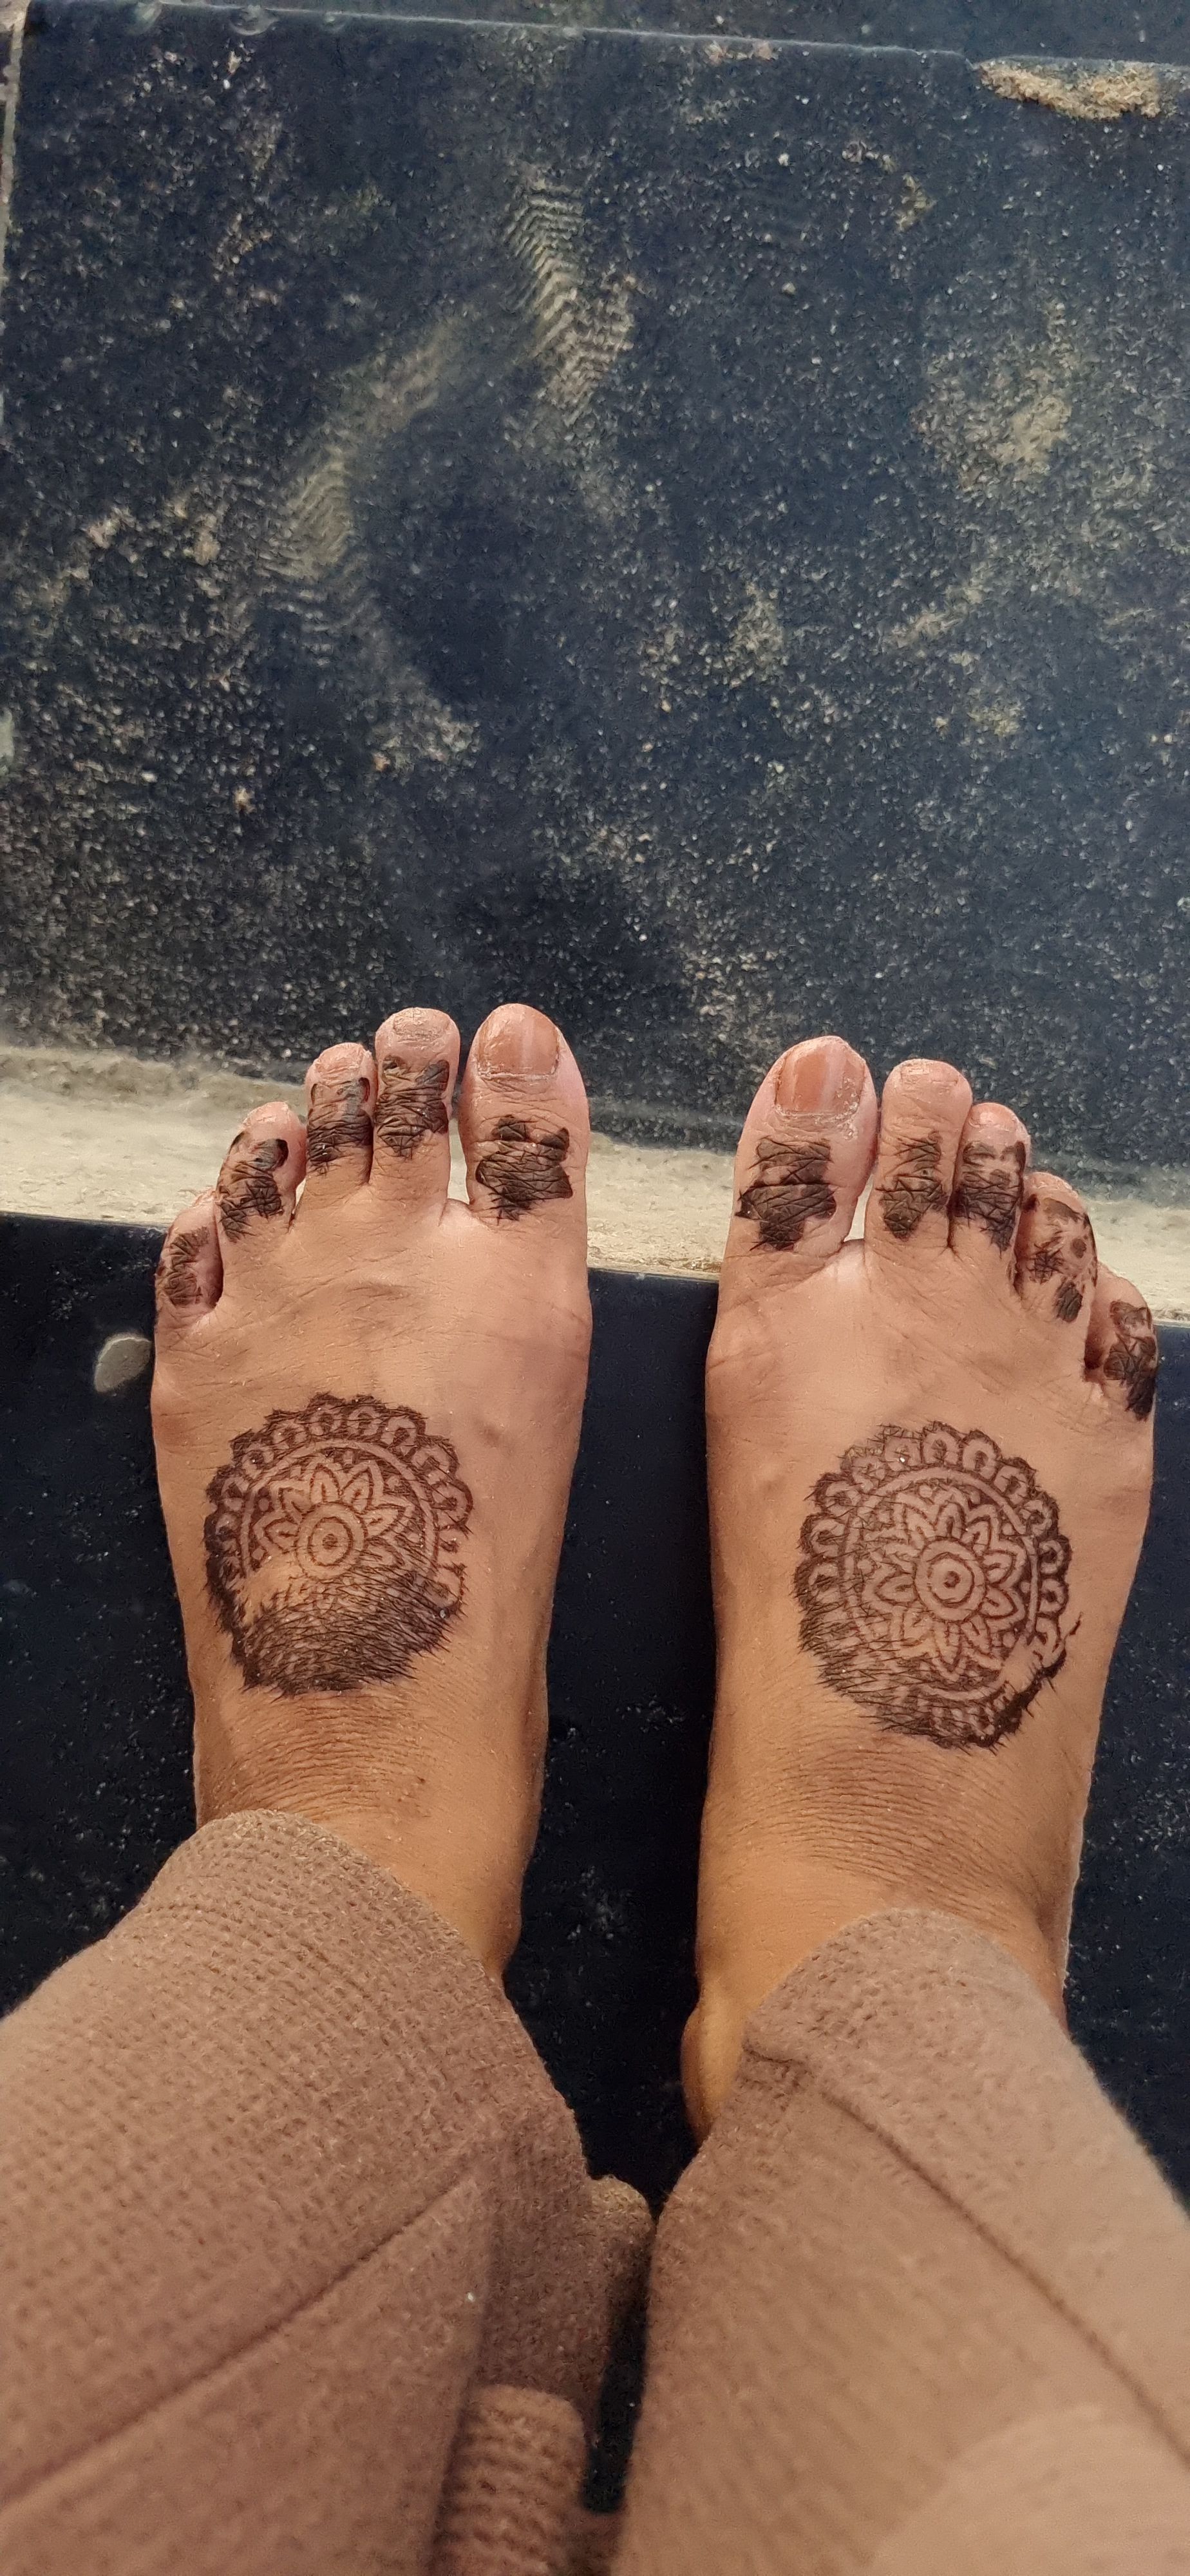
Creating Your Own Designs
Now that your organic henna paste is ready, it’s time to create some beautiful designs. Use a plastic cone or a fine-tip applicator bottle to apply the paste to your skin. Start with simple patterns like dots and lines, gradually moving on to more intricate designs as you gain confidence.
Caring for Your Henna Design
Once you've applied your design, let it dry completely. Avoid washing the area with water for at least 24 hours to allow the dye to set. For a darker stain, you can leave the paste on overnight and gently scrape it off in the morning.
Enjoying Your Natural Creation
With just a few natural ingredients, you can create stunning henna designs that are entirely free from harmful chemicals. Whether you're preparing for a special occasion or simply exploring a new hobby, DIY organic henna is a rewarding and creative endeavor. Enjoy the process and embrace the beauty of your natural creations!